How do we replace the facade DGU, remove the existing DGU, and place the Aluminium Bullnose Cap on the Scaffolding?
Facade Maintenance- Glass Replacement-
Work Completed at Mumbai
- Scope Of Work:
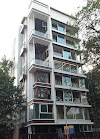
The Commercial Building is having Curtain wall glasses with adjacent Top top-hung openable panels on all Floors.
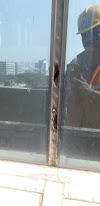
Facade Glass to replace and Alum Fin to install
One of the fixed glasses was replaced by another contractor in the wrong manner. New glass supplied by the contractor was directly placed with structure silicone over the mullion without placing the Sash frame / Subframe.
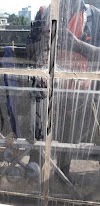
Since the installation was not as per detail and not as per the other glasses; the sash frame which appears as a rectangular frame from the inside was not visible on this panel only as required.
Facade Glass from Inside- Sashframe is visible at the periphery
Because of such wrong work, Aluminium Fins over vertical grooves were not allowed to be installed by the previous contractor.
- What we did ?:
We were appointed to the Site for DGU replacement work. The sash frame which was not used was available in stores.
- Ordering a DGU:
We could get the dimensions of DGU (having steps at all 4 edges). The inner glass size was exactly the size as that of the aluminum Frame. For outer dimensions, old broken glass was available.
We could not use the existing new glass installed by an earlier contractor because till our glass gets installed there will be a huge AC loss at that office ( for at least 7 days).
We ordered a Double Glass Unit having SKN154 glass ( outer lite) and Exact Dimensions from the inside. Such shade is unique and rarely available with suppliers and processors. (We could not buy glass from the processor who gave the quotation because till we get a work order from our client and we order new DGU, the available stock was sold by the processor.) We searched again for the availability of glass and succeeded in getting it as per requirement.

Facade DGU Panel Preparation
- Panel Preparation:
New glass was unloaded at the site weighing 87 Kgs. The surface of the DGU and Aluminium Frame got cleaned with thinner. We put the IP solution over the Aluminium Frame. Put masking tape on the surface where the silicone should not get stuck.
Norton Spacer Tape is placed at the inner edge of the Aluminium Frame keeping its protective tape unfolded at the end. So protective tape over Norton tape can be removed only after placing the DGU in the correct place.
Once we ensure Norton Tape is at the correct place all around the periphery of the Aluminium Frame, we lift the DGU and place it over Norton Tape. Checked all corners again.
Once we ensure the correct placement of glass, unwanted surfaces are covered with masking tape, pouch containing 600ml structure silicone DC995 in a silicone gun. DC995 is inserted in the space between the inner surface of the outer glass and the outer surface of the Aluminium subframe.
With the help of plane flexible flashings, structure silicone was forced to go inside to the maximum. This step was done for all four edges and inspected the glass from the outside if any cavity remained unfilled. Such a cavity was observed at one location and rectified.
The curing time of this panel was allowed to dry for 2 weeks. After 2 weeks, we inspected the panel again and decided to place the glass at the location where it was required.
4 laborers are required to lift and carry DGU sizing more than 1.2-meter length of edges while moving the glass.
We placed such glass on the floor near the location where it is required.
- Removal of earlier DGU
Till the time, Aluminium scaffolding is placed from outside and fixed with the ropes at the pocket terrace.
Till the DGU loader reached the location carrying heavy glass where new glass is to be replaced, another team of labor was cutting existing dry structure silicone from inside and dry weather silicone outside. This was a must activity to remove the existing glass installed by the previous contractor.
While removing structure silicone it was necessary to take care that the gasket should not get cut.
Facade DGU removal with Suction Cups
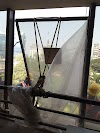
Once all dry silicone was removed previous DGU having 90kg weight was removed with the help of Glass suction cups ( 2 men inside and 4 outside).
New DGU with Aluminium panel made with the sash frame taken out from the same opening diagonally where it is going to place. ( There was no other location from where DGU could be taken out.)
- Locating DGU at the Panel location
 |
| Facade Glass to replace and Alum Fin to install |
One of the fixed glasses was replaced by another contractor in the wrong manner.
 |
| Facade Glass from Inside- Sashframe is visible at the periphery |
- What we did ?:
- Ordering a DGU:

- Panel Preparation:
- Removal of earlier DGU

- Locating DGU at the Panel location
The next challenge comes here...
Since earlier DGU was placed directly over the mullion with structure silicone, earlier toggles were misplaced !!!
Therefore after placing the DGU on the Glass supporter at the bottom edge, support from the sides and top as well was important.
For this, we bought a 5mm thick and 25mm wide plate bar. Cut it into 40mm lengths and make 11 pieces.
This plate was inserted at the legs of the sash frame by 20mm. The available depth itself was 20mm.
20mm length protruding outside the frame overlapped the legs of the mullion. Here we made a drill on a plate and allowed a screw to go to the depth taking care that it will not puncture the mullion.
Actually, the screw itself was selected such that it will reach the flat face of the mullion. (It is just like screwing the pressure plate.)

Customized Toggle fixed with screws at Mullion Nozzle

At the side edges, we placed 4 such toggles, and on top, there were 3 toggles.Screws got fixed till we get a flat surface parallel to adjacent glasses.
After this, the backer rod was placed in grooves at all sides and subsequently by weather silicone DC789 (Black). With Flexible pieces of Flashing, leveling is done for weather silicone.
Toggles at edges and Backer rod between Grooves with silicone drop-on screws
Allowing the weather silicone to dry at the place, the pressure plate which was tied to the entire process and which was kept open before our work started, was kept at the proper place over grooves.
After fixing the pressure plate, a drop of silicone was left on every screw.
- Aluminium Bullnose Capping installation

- Aluminium Bullnose Capping installation
Then Aluminium cap having a bullnose shape is placed vertically for a snap-fit. (It got cleaned and dry weather silicone got removed to make it ready for installation.)
It got engaged a little with snap-fit. Then Hammering over the Bullnose is done by keeping a wooden plate over the bullnose so that there will not be any damage after banding by hammer on the surface of the bullnose. Weather silicone with little sealant bite is placed at some intervals at bullnose edges.
 |
| Aluminum Fin Fixing with Hammer then fixing with screw |
Since the bullnose was not getting fixed easily and it was coming out from another end while hammering over one end; one small screw is drilled at each end of both Bullnose Aluminum Cappings.
- Handover:
After completion of all processes; excess silicone was removed. the surface of DGU from outside and inside got cleaned. Aluminum scaffolding was removed.
 |
| Facade Glass after replacement and Alum Fin installation |
Contact us for Glass replacement work at your premises.
We will be happy to serve you.


0 Comments